

Browsing validators
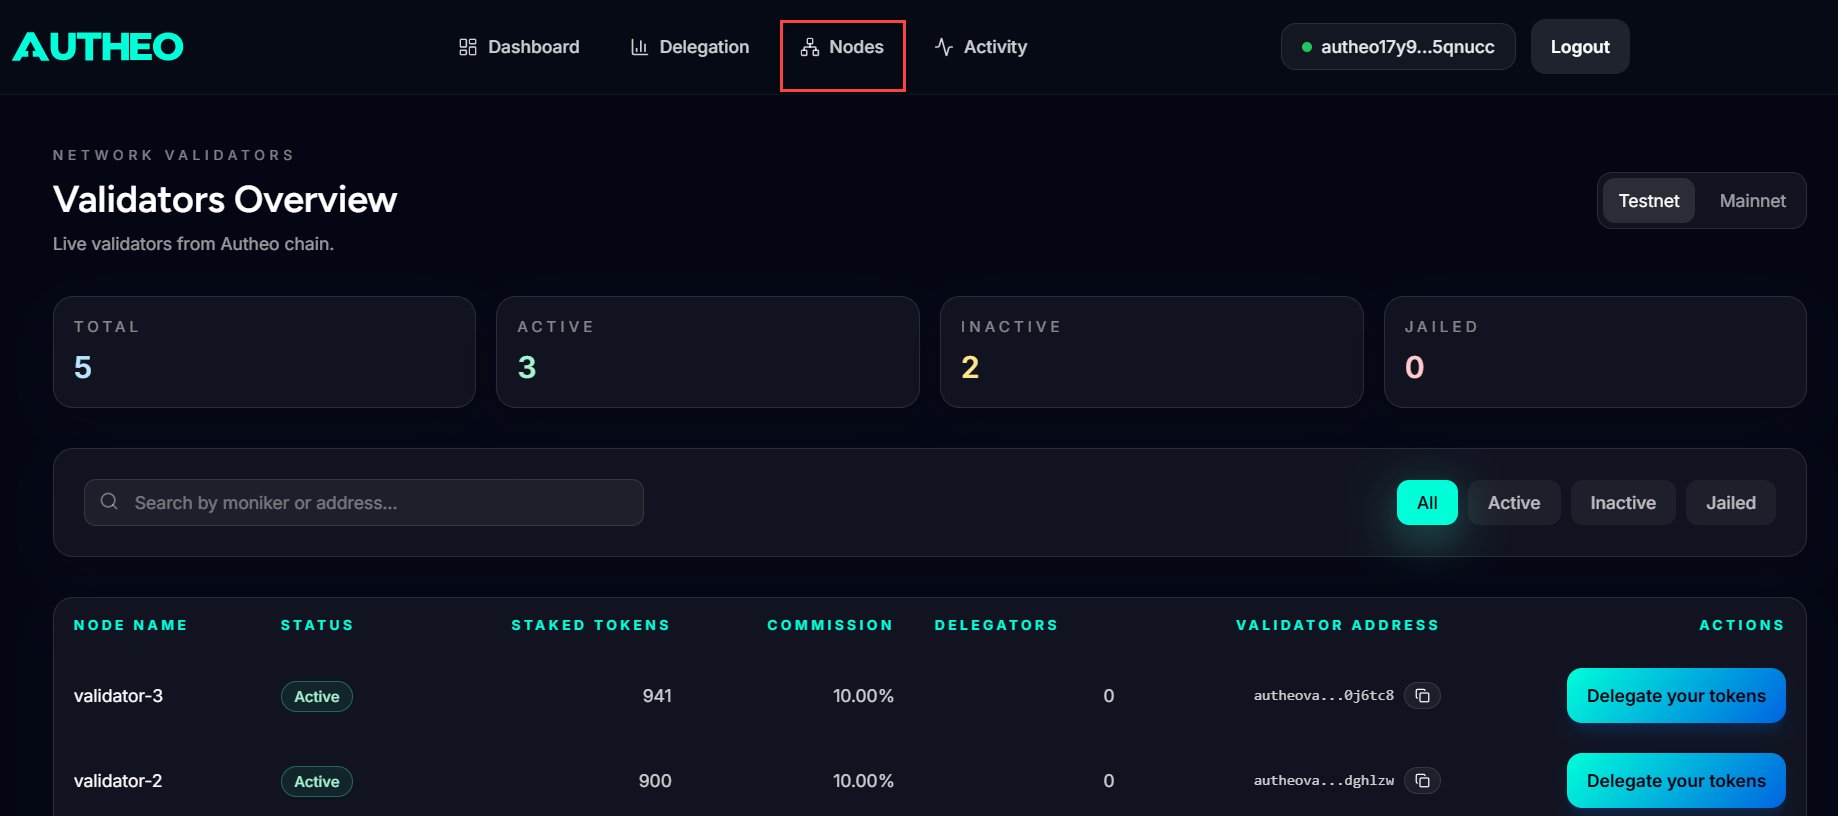
Navigate to the Nodes page from the main menu.- Use the search bar to find validators by validator name (moniker) or validator address.
- Use the status dropdown to filter:
Each validator entry shows: moniker, status, address, commission rate, and token balance. Click a validator to begin the delegation process.
Delegating tokens
1
Open the delegation modal
Click a validator from the Nodes page to open the delegation modal. Review the validator’s details — commission rate, status, and description.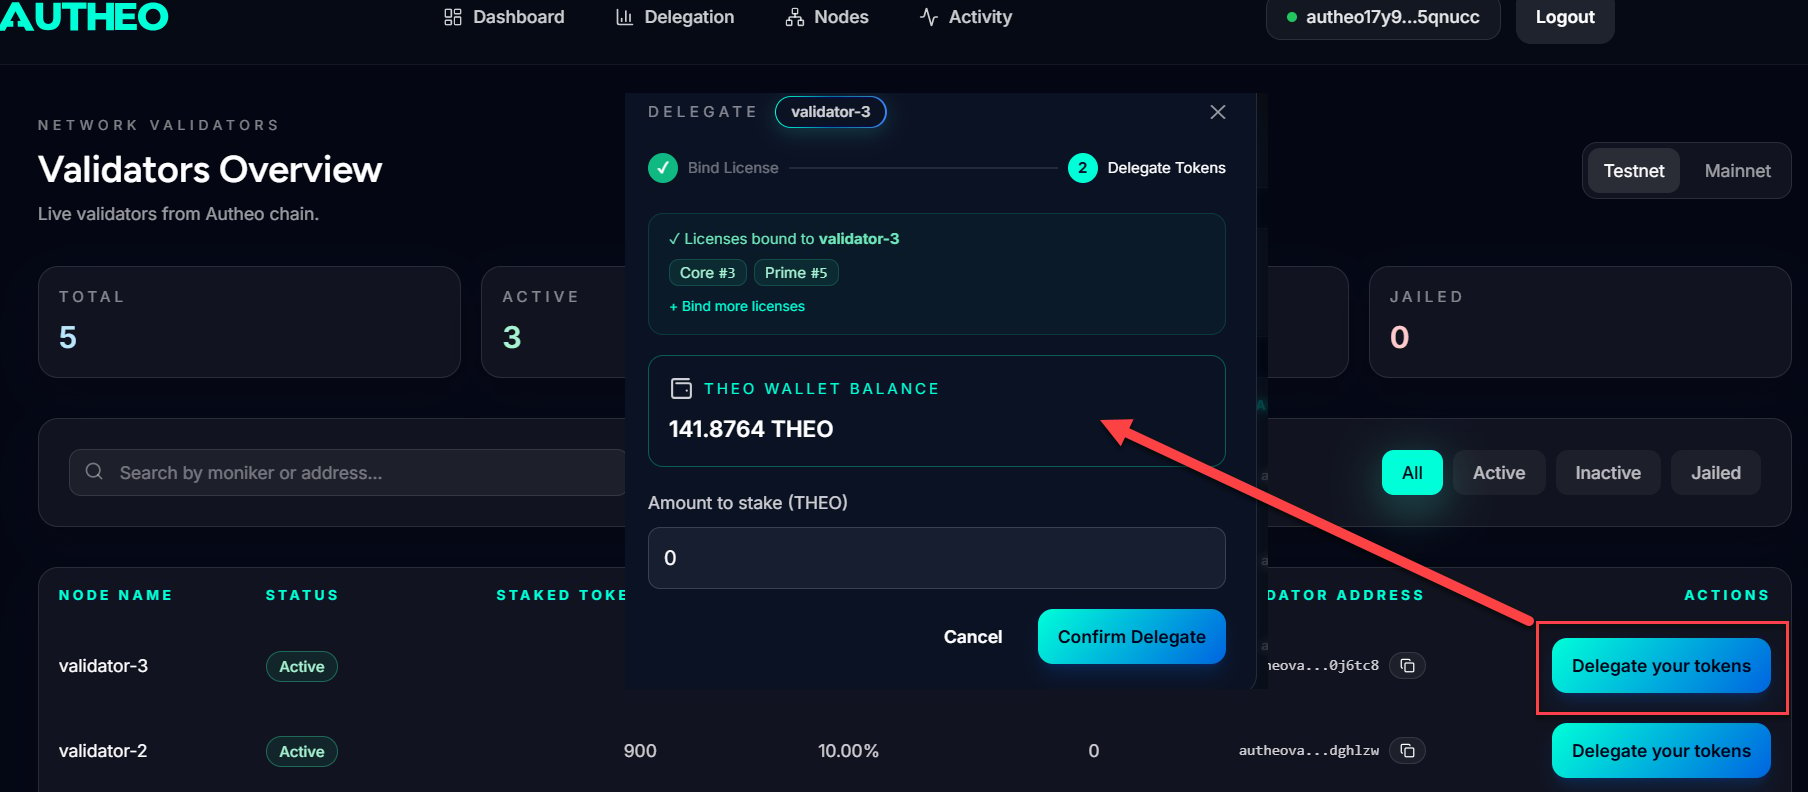
2
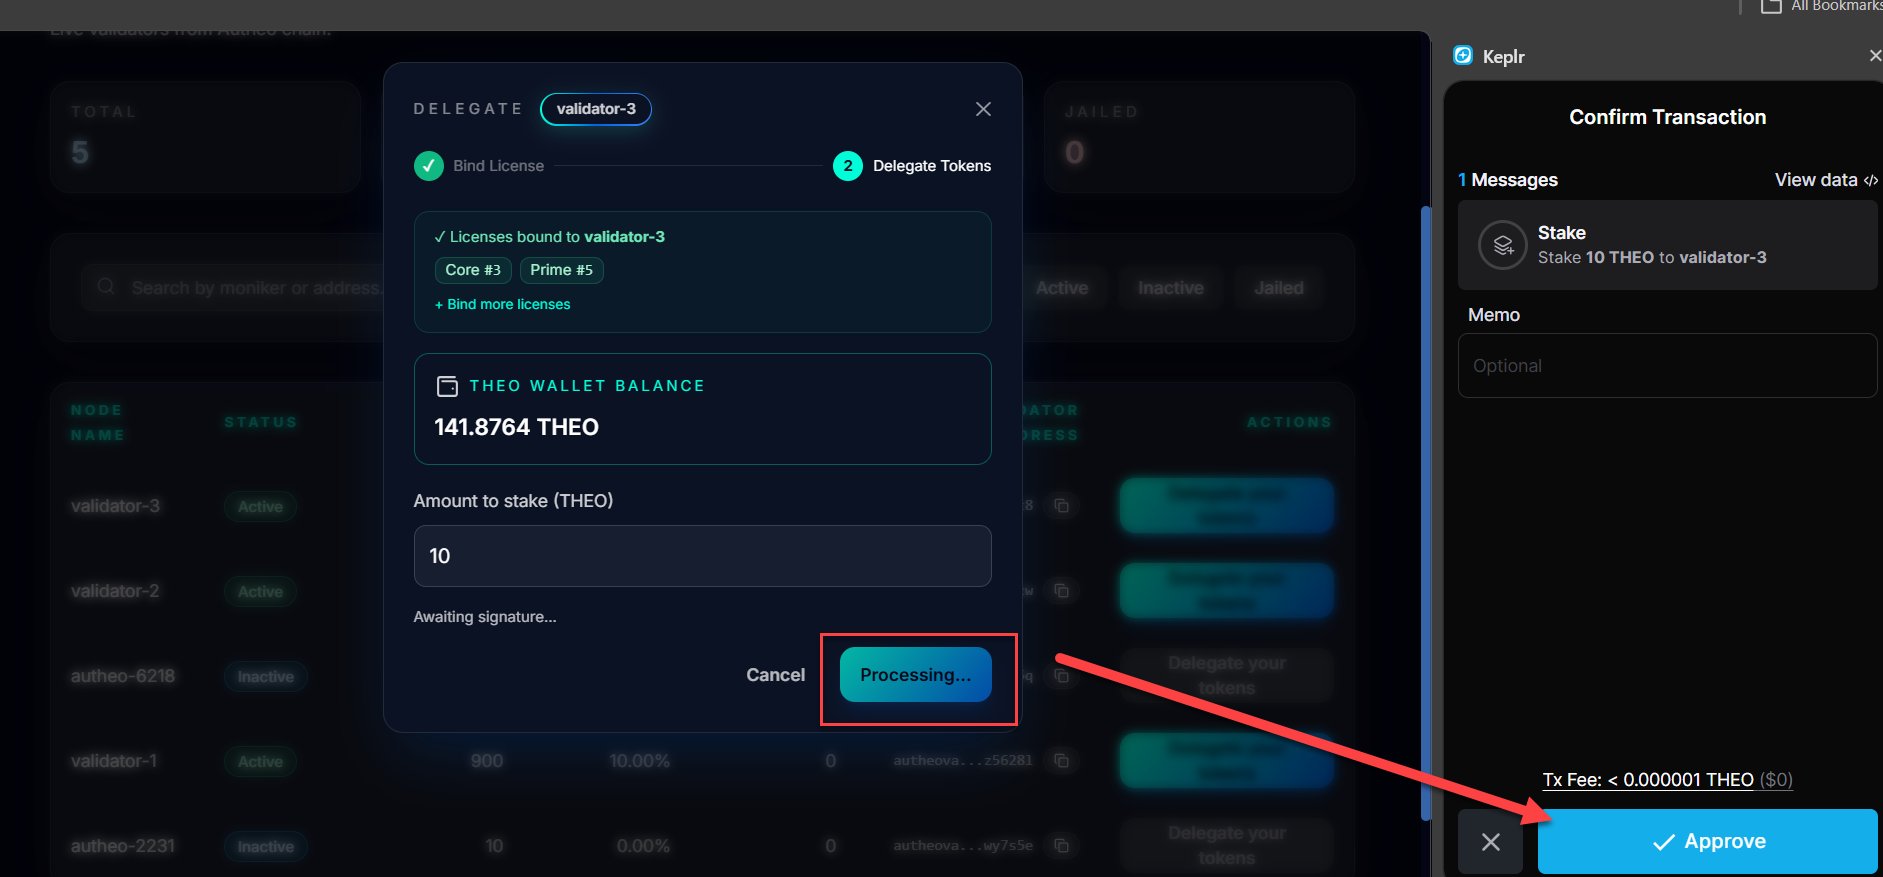
Enter the delegation amount
3
Confirm and sign
Click Confirm Delegate and sign the transaction in Keplr. Your delegation becomes active once the transaction confirms on-chain.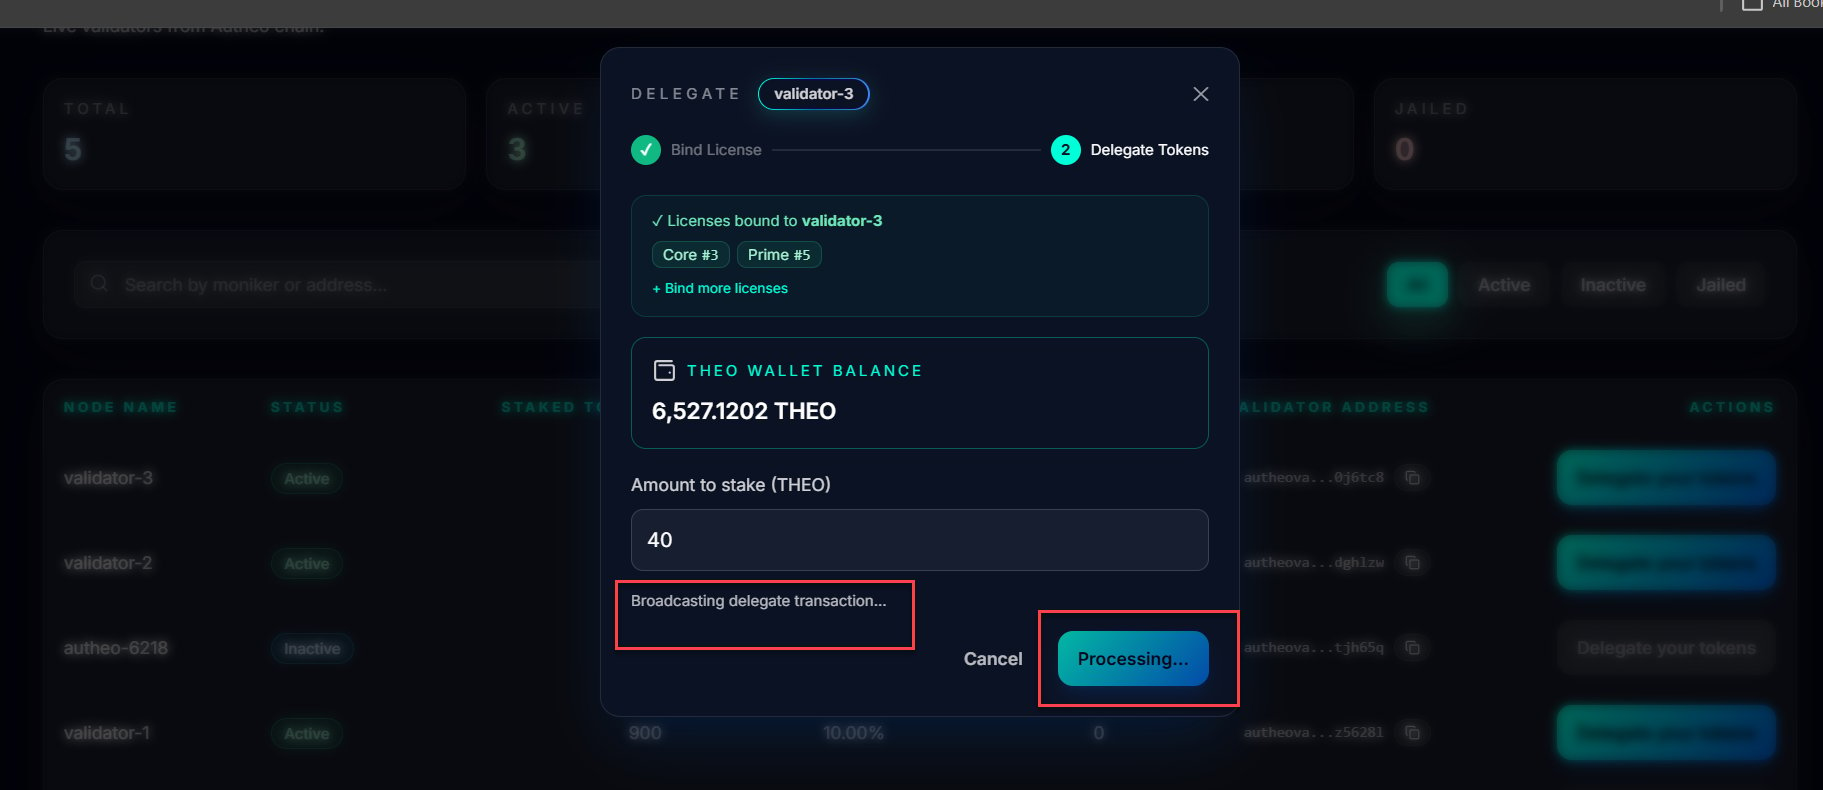
Order matters: Delegate your THEO to the validator first, then bind your Prime or Core license to that delegation. The license becomes ACTIVE after it is successfully bound.
Binding a license
After delegating, you can bind a Prime or Core license to that delegation. The license becomes associated with the selected validator and moves fromBOUND to ACTIVE status when the transaction succeeds.
1
Select the license type
Choose Prime or Core from the license type selector.
2
Choose the license ID
Select an available license from the License ID dropdown. Only unbound licenses appear in the list.
3
Bind and sign
Click Bind License and sign the transaction in Keplr.
Managing active delegations
Navigate to the Delegation page from the main menu to see all your active delegations.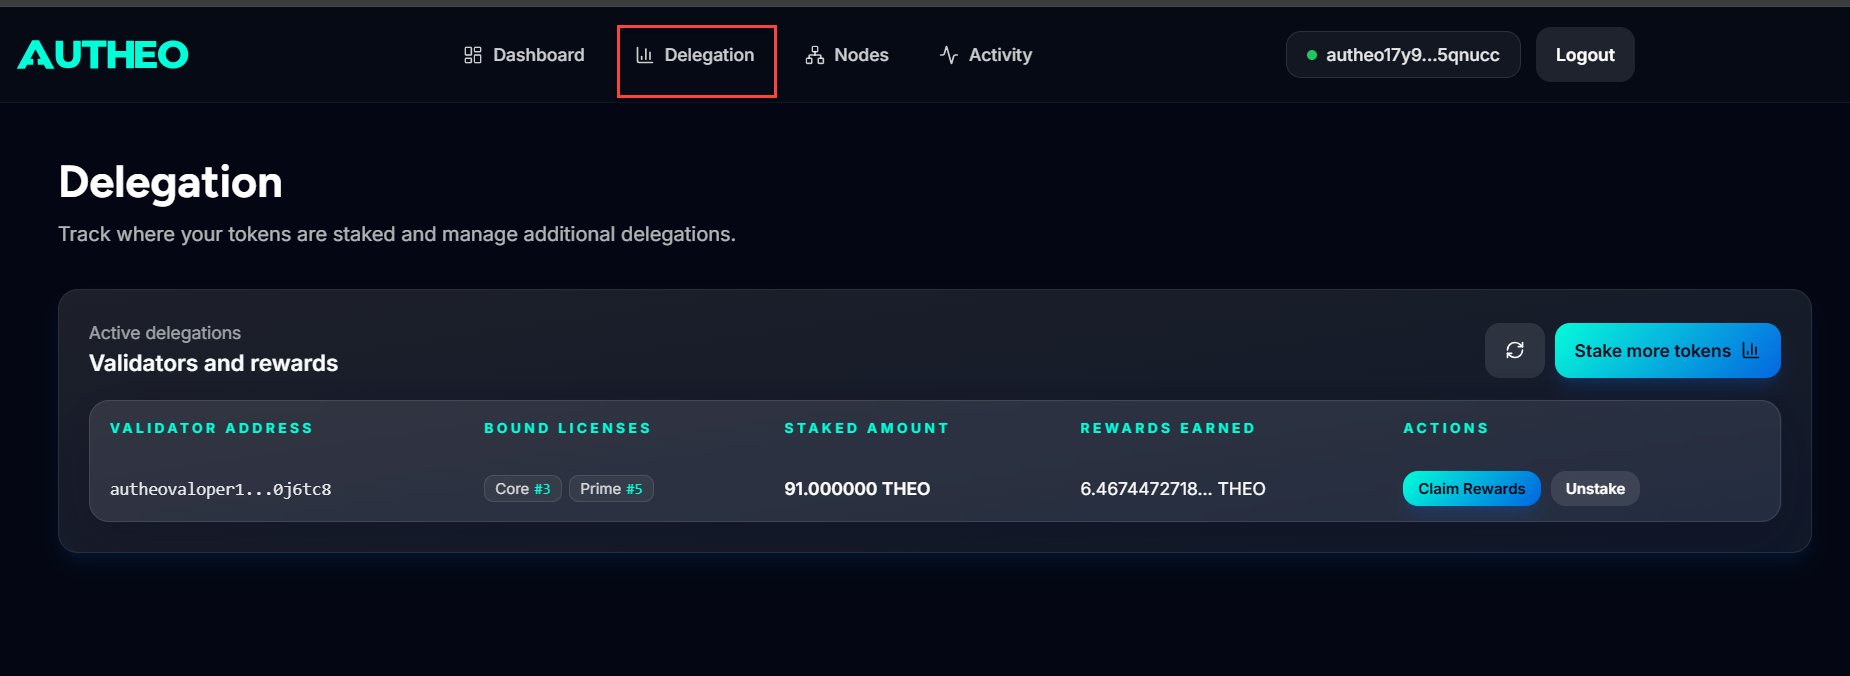
Changing validators: Autheo does not currently support redelegation. To move your THEO to another validator, you must unstake first and wait for the approximately 21-day unbonding period to complete before delegating to the new validator. See Moving your delegation to another validator.From this page you can claim rewards, unbind licenses, and initiate unstaking. See Rewards and unstaking for details.