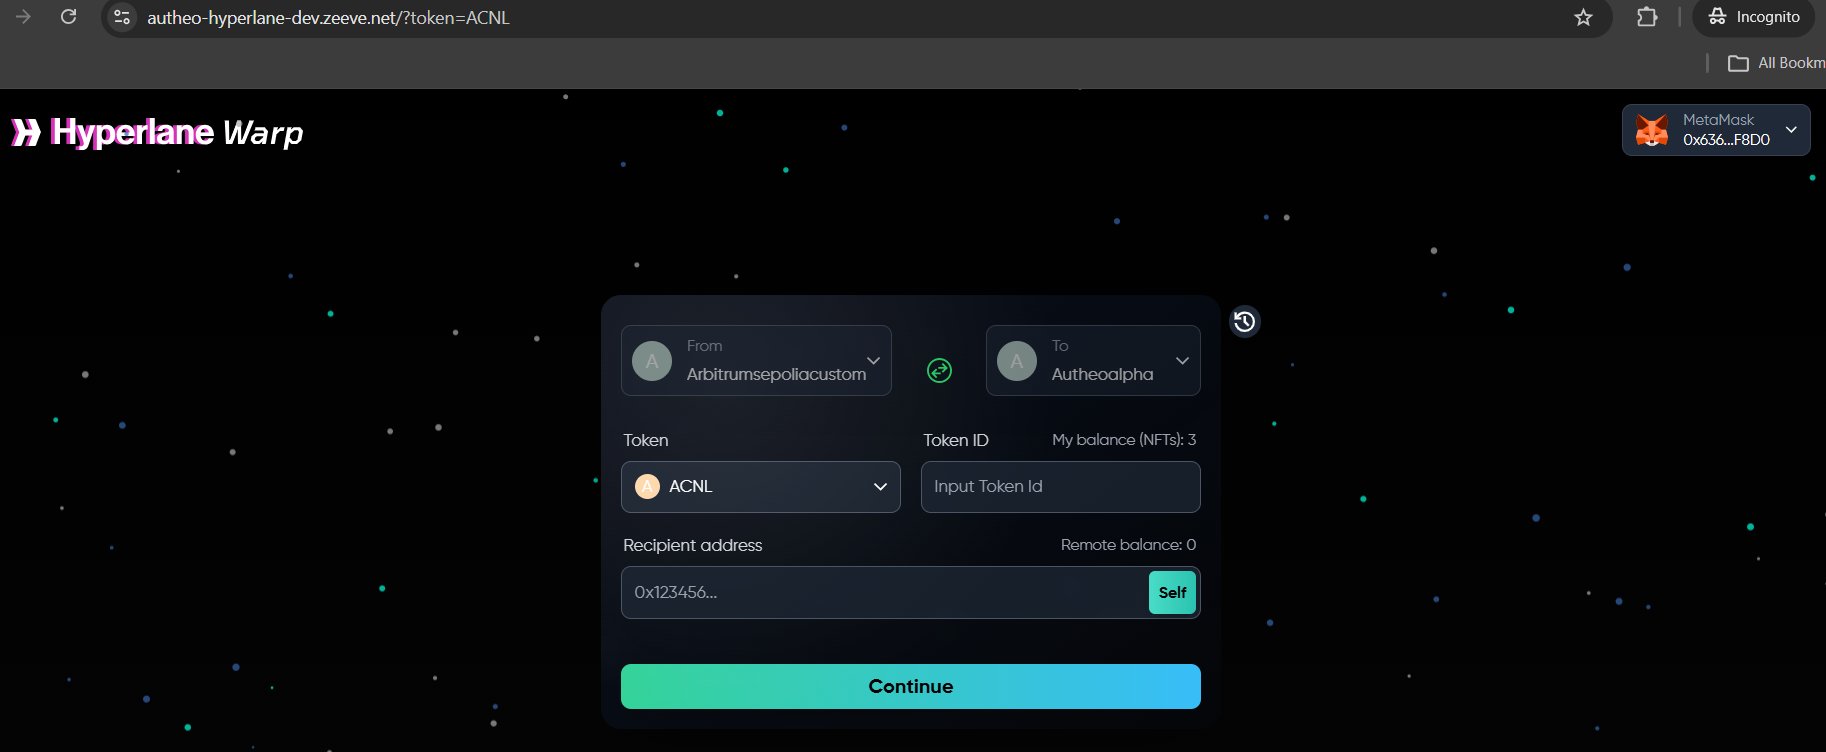
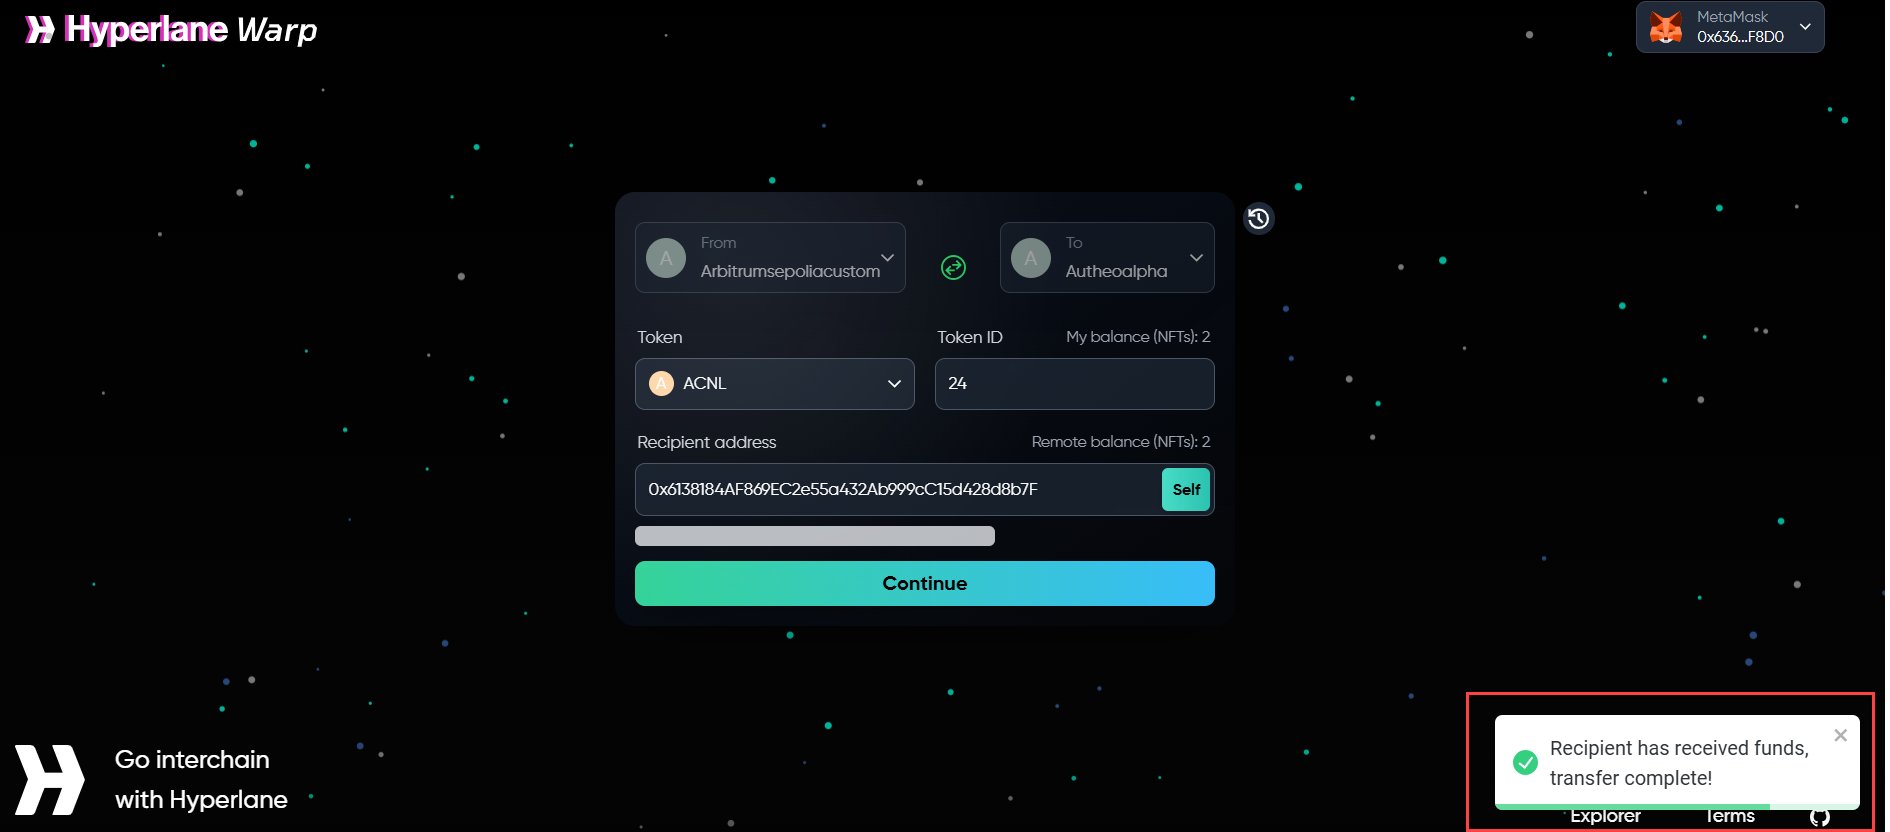
Bridge interface
The Bridge has a clean, single-page layout with four main areas: Header — Application logo and the Connect Wallet button showing connection status. Transfer Token Form — The central card and primary interface for initiating transfers:| Element | Description |
|---|---|
| From (Source Chain) | Dropdown selector for the originating blockchain |
| To (Destination Chain) | Dropdown selector for the target blockchain |
| Swap button | Arrow icon (↕) to quickly swap source and destination |
| Token selector | Dropdown to choose which token to bridge |
| Token ID / Amount | Numeric input with a Max button to auto-fill your full balance |
| My NFT Balance | Your current token balance on the source chain |
| Recipient address | Text input for the destination wallet address |
| Remote balance | Recipient’s current balance on the destination chain |
| Continue button | Proceeds to review mode |

Transferring tokens
Select the source chain
Click the From dropdown. A searchable chain selection modal appears. Select your source chain (e.g., Arbitrum Sepolia).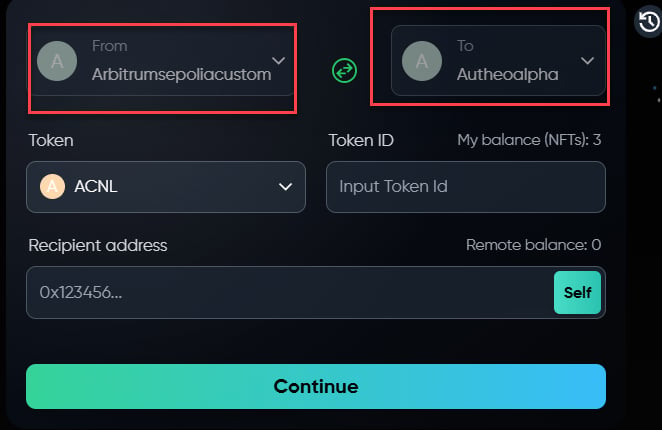
Select the destination chain
Click the To dropdown and select the target chain (e.g., Autheo Alpha). The same chain selection modal is used for both source and destination.
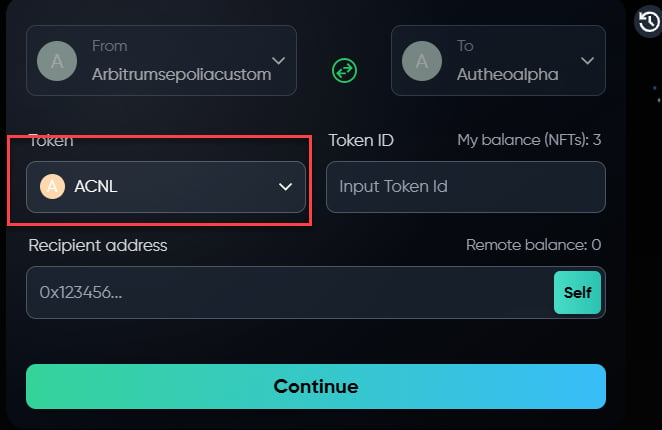
Choose a token
- Click the Token selector
- A modal opens showing available tokens for the selected route
- Search by token name, symbol, or contract address
- Click the desired token
Enter the token ID or amount
Type the token ID (for NFTs) or amount in the input field. Your available balance is shown as My balance.
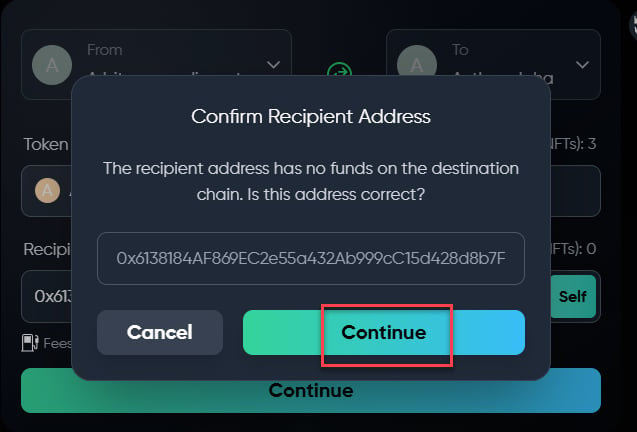
Enter the recipient address
Enter the destination wallet address in the Recipient address field. The application displays the recipient’s current balance on the destination chain.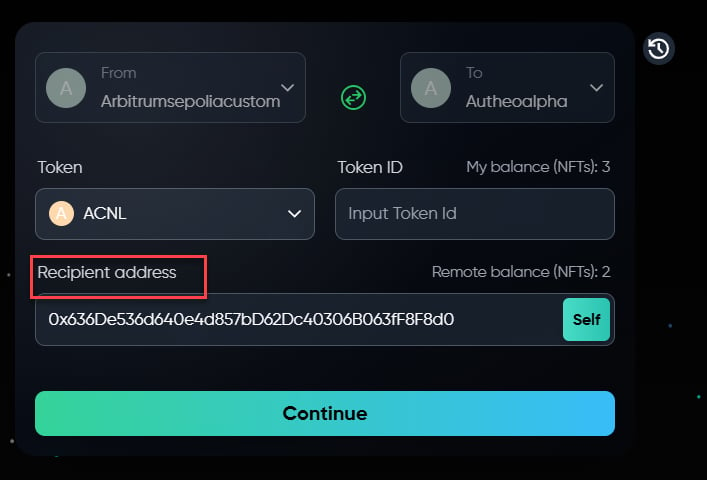
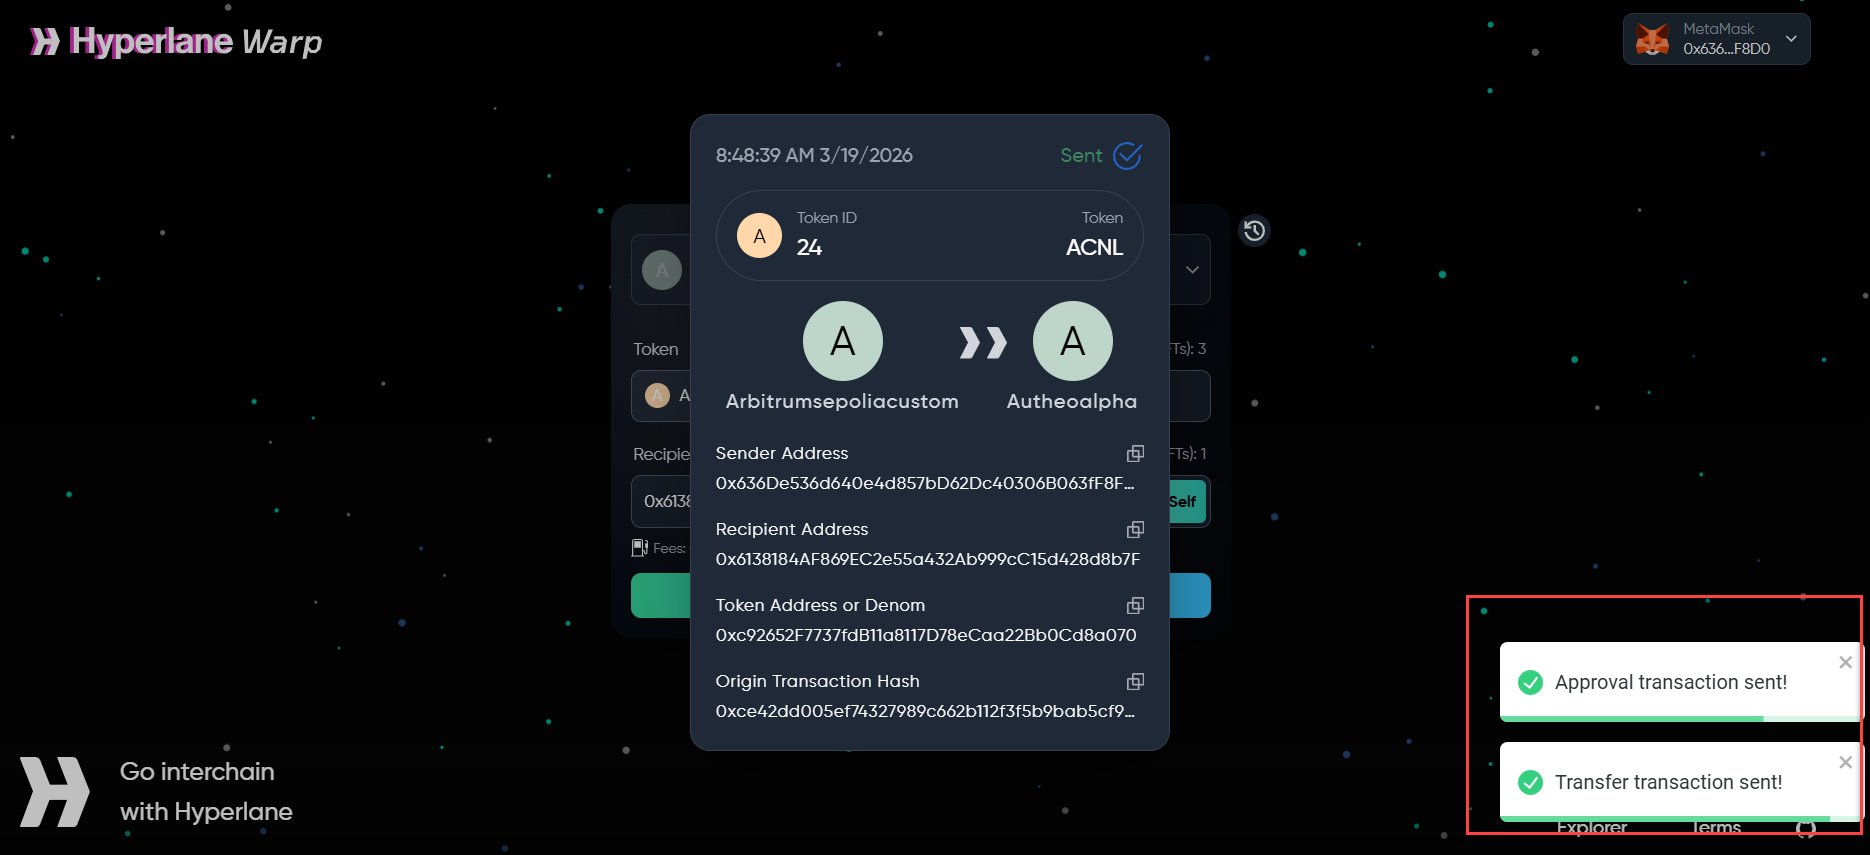
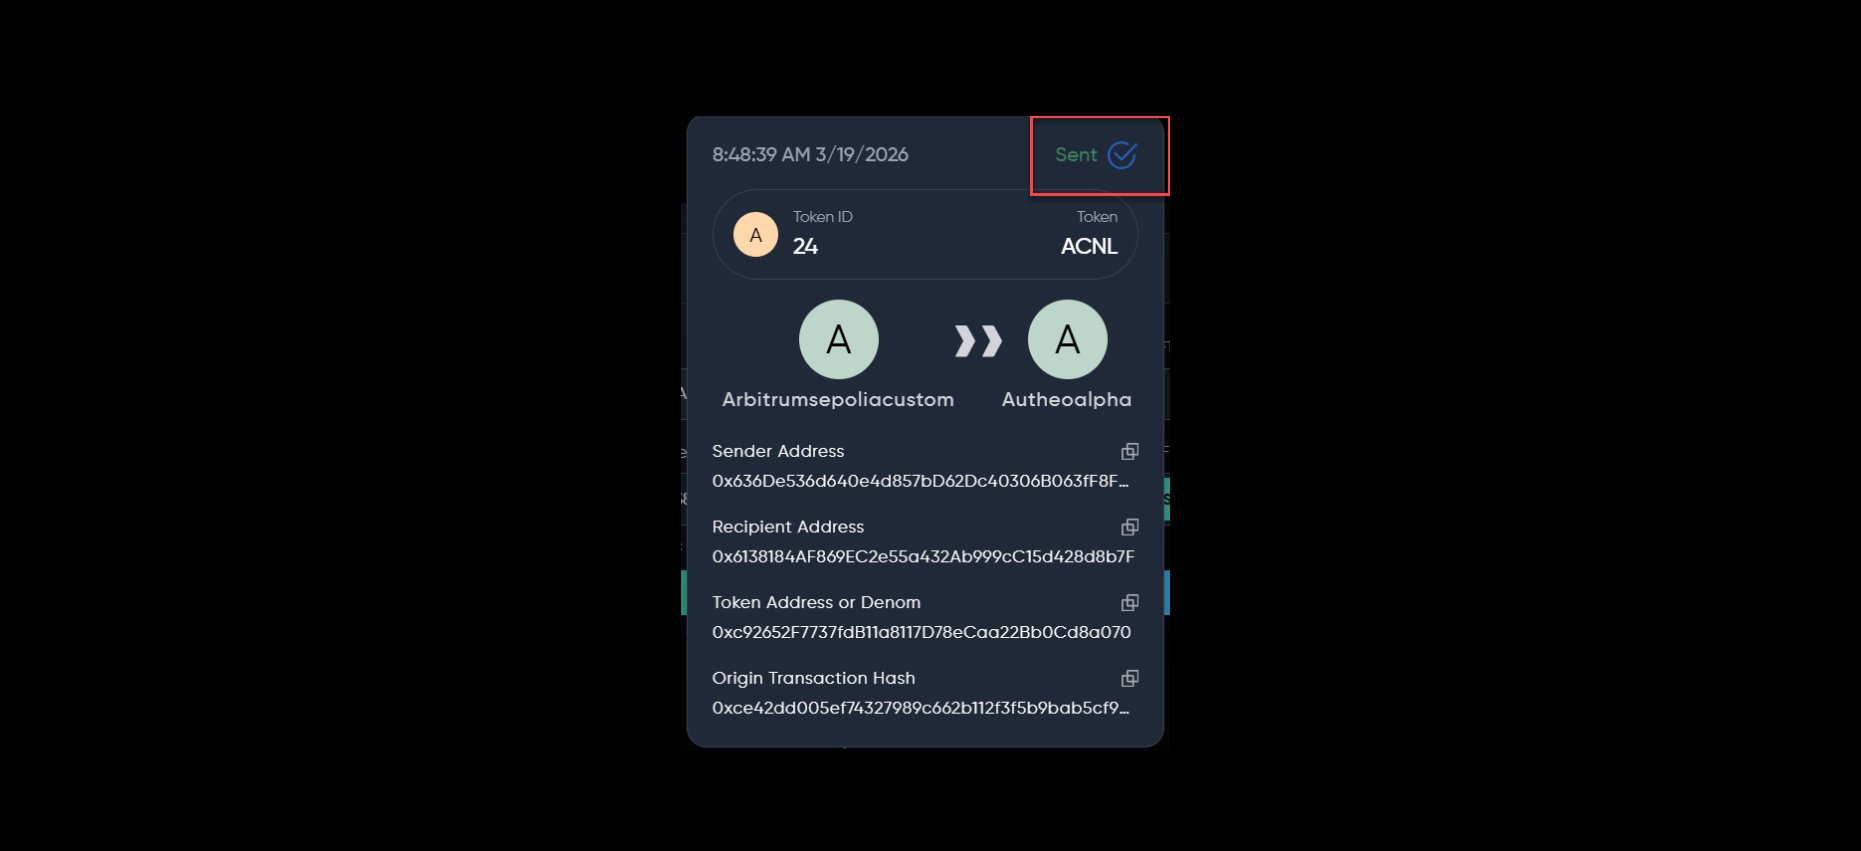
Review and confirm
- Click Continue to enter review mode
- Verify all details: source and destination chains, token type and amount, recipient address, and estimated interchain gas fees
- Click Cancel to go back and correct anything, or Send to proceed
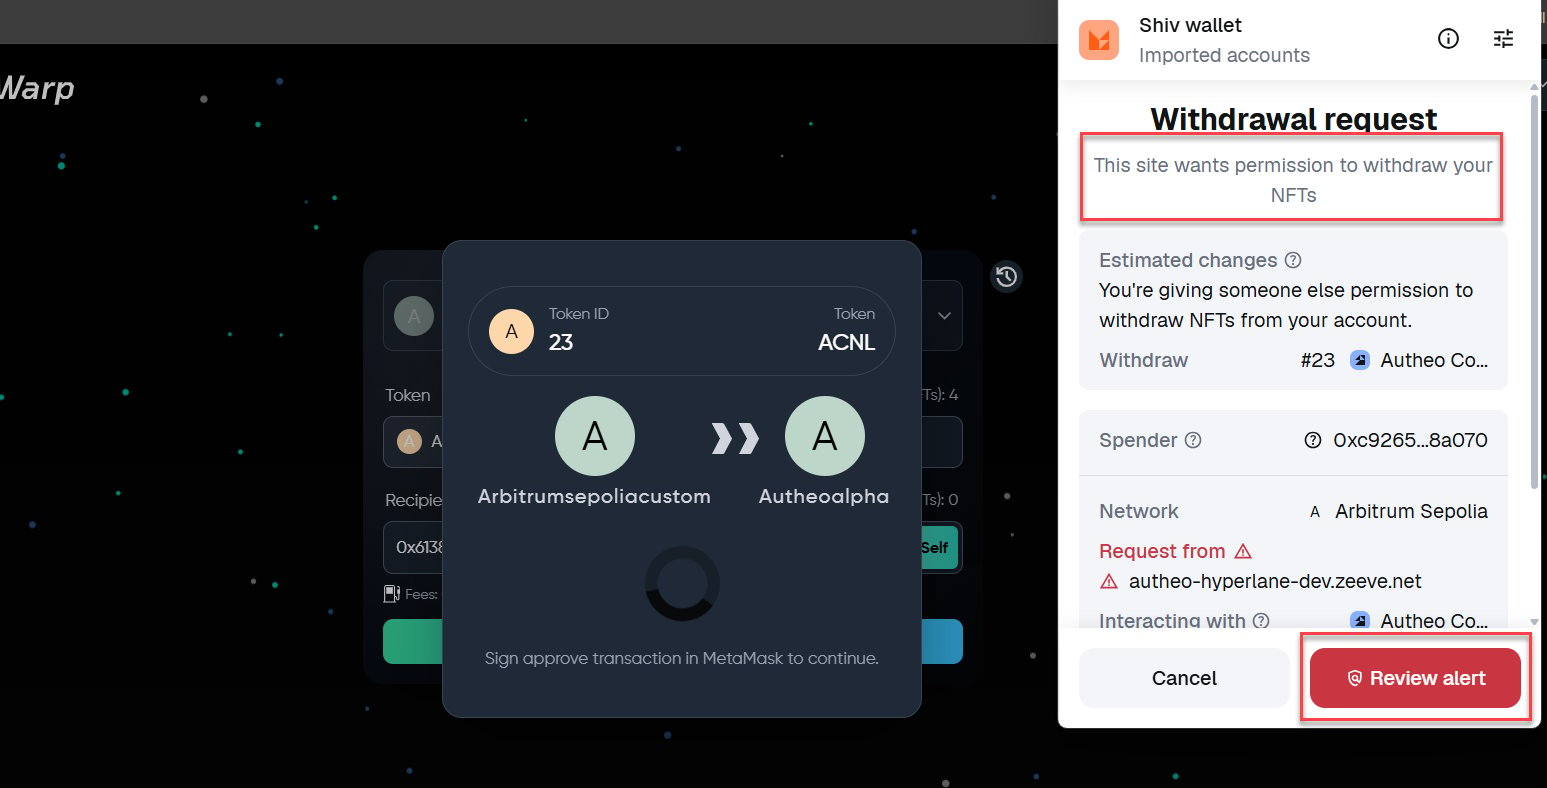
Sign the transactions
Depending on the token type, you may need to sign one or two transactions:
The UI shows a step-by-step status progression: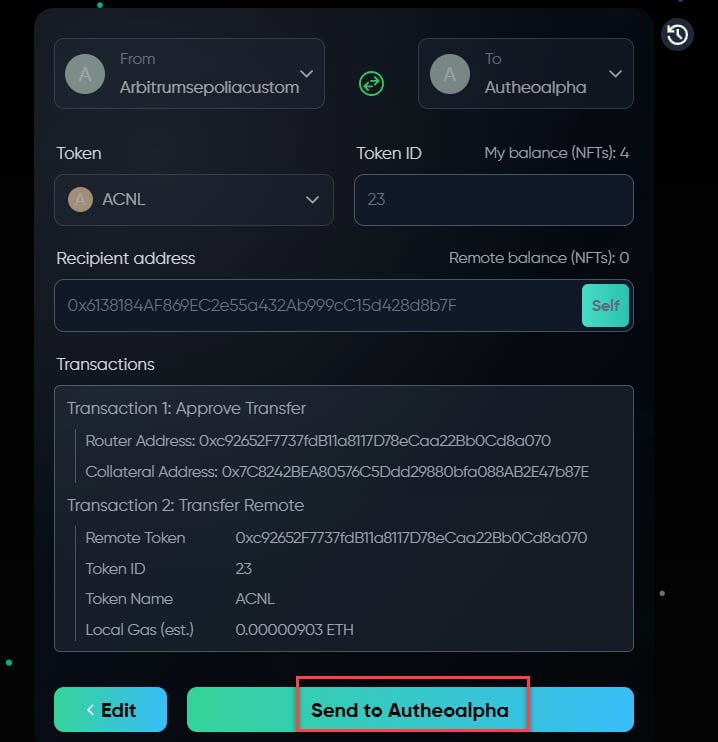
| Transaction | When required | Purpose |
|---|---|---|
| Token approval | First transfer of an ERC-20 token | Grants the warp route contract permission to transfer tokens on your behalf |
| Transfer transaction | Every transfer | Executes the cross-chain token transfer |
- Preparing
- Creating transactions
- Signing approval
- Confirming approval
- Signing transfer
- Confirming transfer
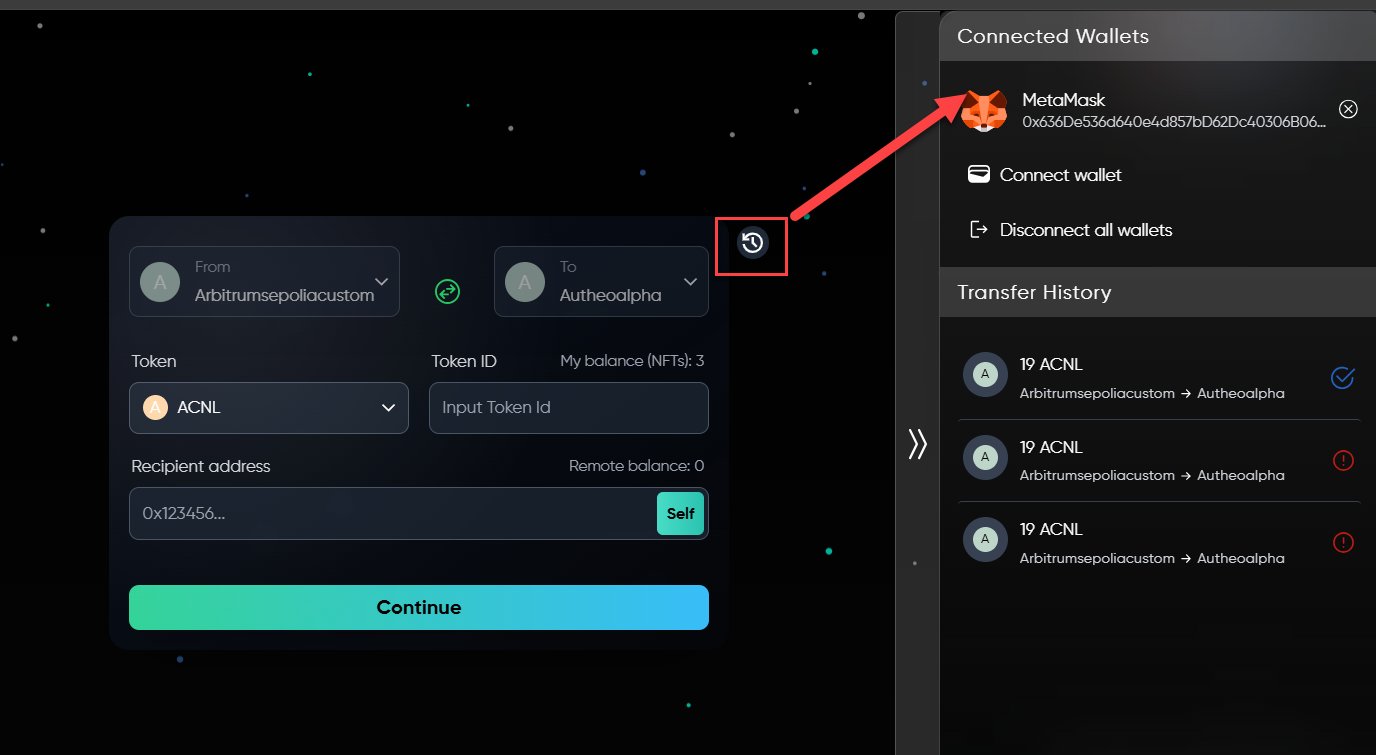
Track delivery
After the source chain confirms: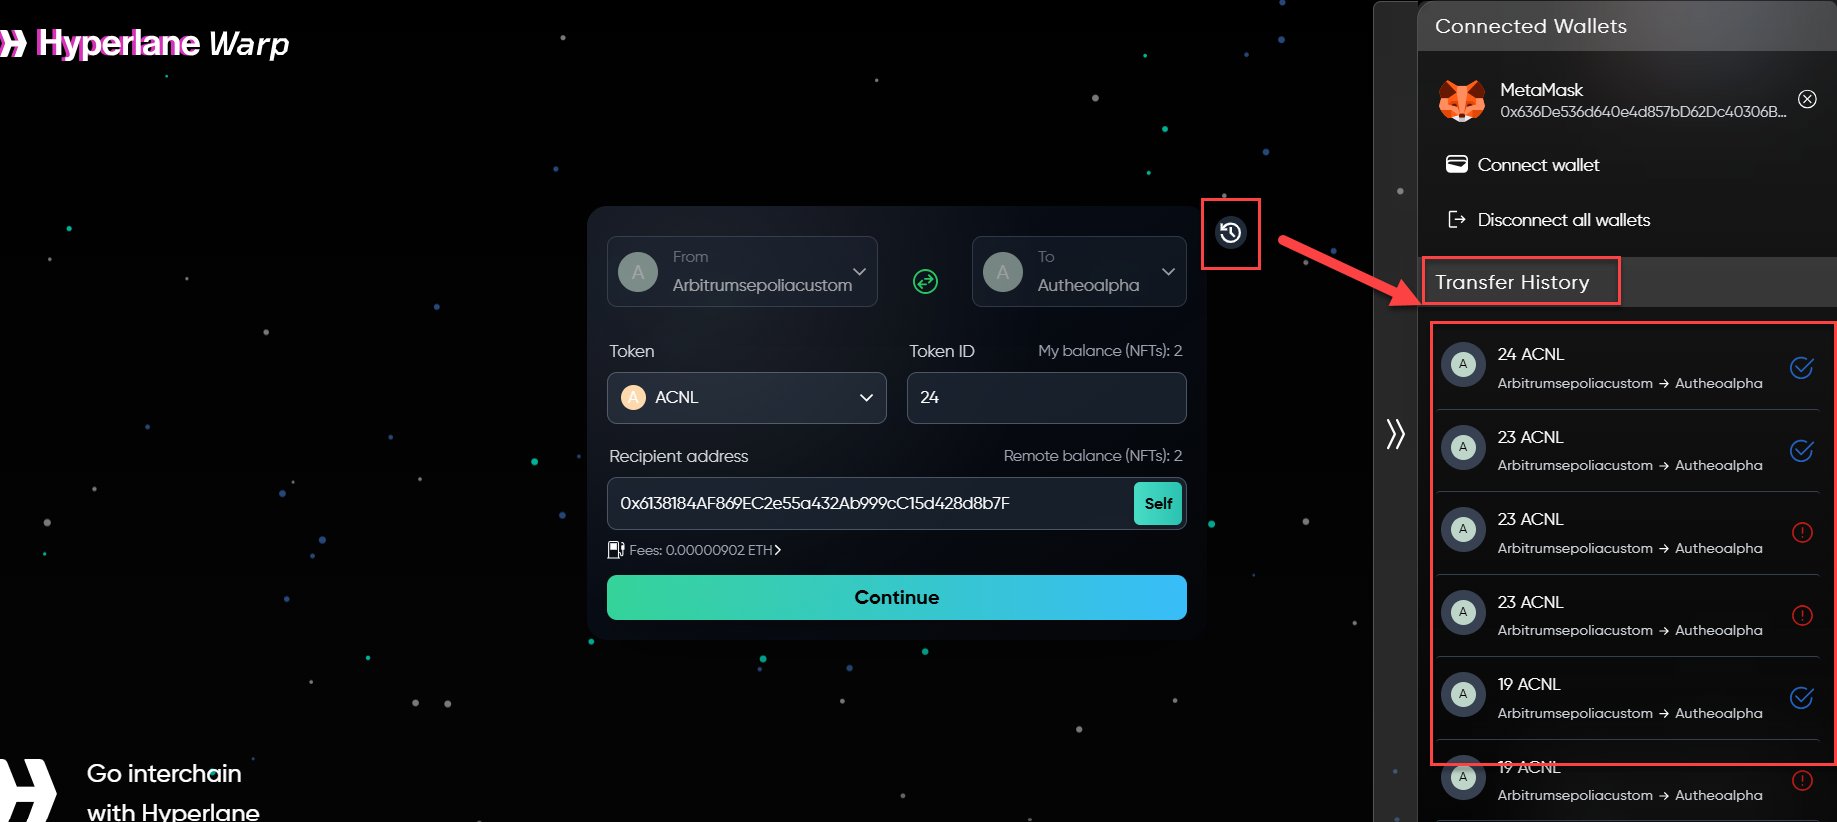
- A success notification appears
- The transfer is added to your Transfer History
- The Hyperlane protocol relays the message to the destination chain
- Status updates once tokens arrive on the destination chain
Token approvals
When transferring ERC-20 tokens, you must first approve the warp route smart contract to spend tokens on your behalf. This is a standard blockchain security mechanism. How approvals work:- First transfer of a token — The application prompts you to sign an approval transaction before the transfer. A small amount of gas on the source chain is required.
- Subsequent transfers — If sufficient allowance remains, you will not be asked to approve again.
- Revoke and re-approve — In some cases, the application may request that you revoke an existing approval and grant a new one.